Accueil Techniques d'Installation
Techniques d'Installation
Installer une clôture à poteaux et lisses pas à pas
Guide étape par étape pour poser une clôture à poteaux et lisses : choix des matériaux, outils, vérifications et sécurité. Appelez 811 avant de creuser; ne remp
Laura Dufresne 7 min de lecture
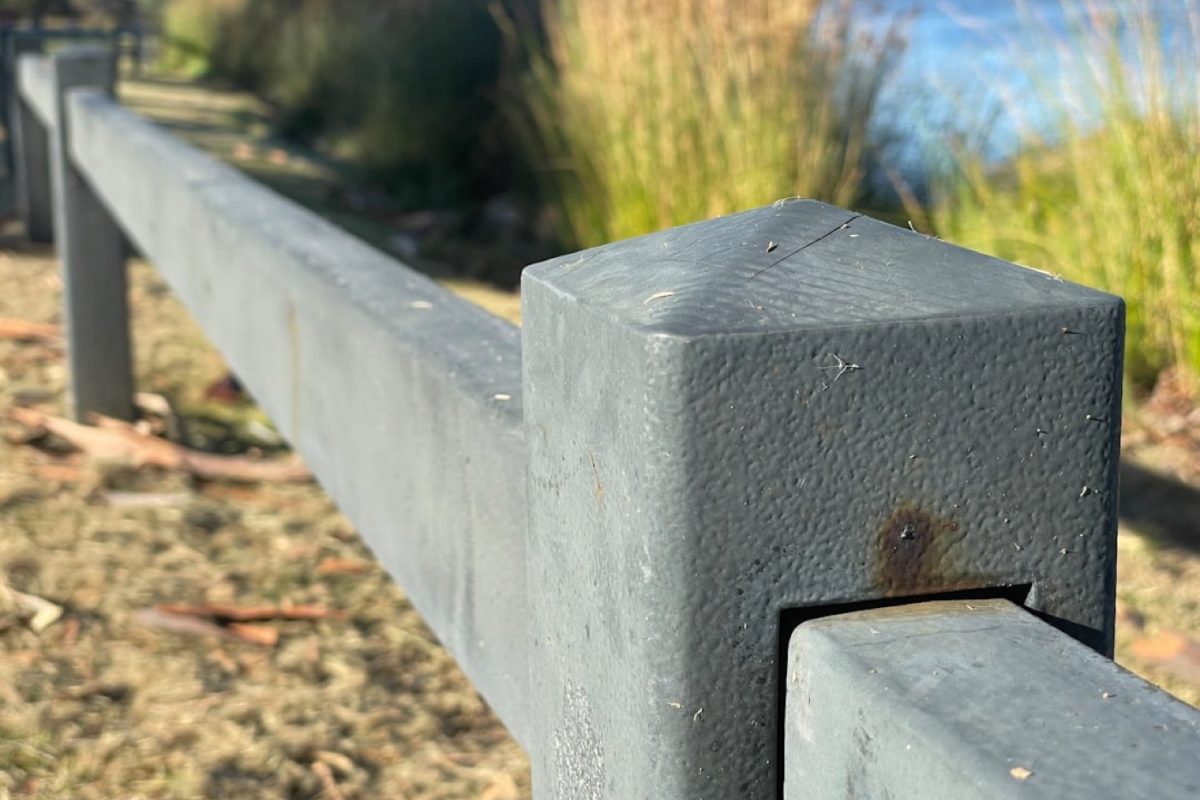
This guide explains, step by step, how to install a post-and-rail fence for typical residential and small-farm uses. It is informational and does not replace professional advice for specific site conditions such as bedrock, high-voltage lines, or permit requirements. Call 811 before you dig to locate underground utilities.
Who this guide is for and the disclaimer
This guide targets experienced DIYers, gardeners, and small-acreage owners who want clear, practical instructions for installing a post-and-rail fence in wood, vinyl, or metal. A post-and-rail fence is commonly used for landscape definition, paddocks, and low-security perimeter demarcation. It is not a replacement for professional evaluation when ground conditions are unusual or when local permits or easements apply.
Do not proceed without checking local codes and utility locations. If you suspect bedrock, major utility lines, or if a permit may be required, contact a licensed professional. This article links to standard references for core recommendations but does not cover specialized electrical fencing or industrial systems (see NRCS for rural fencing principles).
Before you start: materials, tools, and checks
Choose materials according to intended use. Common wood choices include cedar or pressure-treated pine; alternatives include metal or vinyl rails and posts. Rails come as dimensional lumber or preformed rails. Posts are usually pressure-treated wood for durability; metal or vinyl posts change fastening details.
Essential tools include a level, a post hole digger or power auger, a tape measure, a plumb bob or line level, a tamper or hand compactor, shovels, clamps, and temporary bracing (sheets, braces, or ratchet straps). Power augers speed work on soft ground; hand diggers remain useful where access is limited.
Verify property lines and obtain any required permits. Always contact 811 to mark underground utilities before digging. For agricultural fencing or when altering pasture lines, consult local NRCS guidance for practice standards.
Preparing the line and marking post locations
Start by laying out the fence line with stakes and a taut string. Use a long tape measure to mark each post location. Typical spacing for posts is generally 6 to 8 ft between posts, with closer spacing—about 4 to 6 ft—used at corners or high-stress sections (This Old House — How To Install a Fence Post; https://www.thisoldhouse.com/fences/post-installation — consulté le 04/09/2026).
On slopes, decide between stepping the rails down fixed increments or racking the rails to follow the slope continuously; both methods affect how rails are cut and attached. Mark gate locations and reinforce those posts in advance.
Digging holes and setting posts
Follow a depth rule of thumb: dig a hole roughly one-third of the post height plus 6 inches (for example, about 36 in for a 6 ft post and about 28 in for a 3.5 ft post) (This Old House — How To Install a Fence Post; https://www.thisoldhouse.com/fences/post-installation — consulté le 04/09/2026). Adjust depth according to the local frost line.
For drainage beneath each post, add about 6 in of 3/4 in gravel at the hole bottom and compact it before placing the post (This Old House — How To Install a Fence Post; https://www.thisoldhouse.com/fences/post-installation — consulté le 04/09/2026). Gravel helps water drain away from the post base and reduces rot risk in wood posts.
Decide between compacted backfill and concrete. Use concrete for end posts, gate posts, or where the soil is too loose to support a post otherwise. When using concrete, place the post, pour concrete, and leave it to set for about 24 hours before applying further loads or attaching rails (This Old House — How To Install a Fence Post; https://www.thisoldhouse.com/fences/post-installation — consulté le 04/09/2026). If you choose compacted backfill, tamp in layers to remove voids and keep the post plumb with temporary bracing until the backfill is stable.
Always check each post with a level in two planes and secure with braces until set. Corner and gate posts should be especially rigid and square; they carry more lateral force when the fence and gates are used.
Installing rails and adjusting the structure
Install the top rail first to set the profile, then add middle and bottom rails as the design requires. Attachment methods vary: rails can be notched into posts, fastened with galvanized screws, or held with metal brackets or saddles depending on material and manufacturer guidance (Lowe’s — How to Install a Split-Rail Fence; https://www.lowes.com/n/how-to/install-a-split-rail-fence — consulté le 04/09/2026).
Vertical spacing of rails depends on fence height and purpose. For livestock containment, place rails closer together and consider additional wire reinforcement per NRCS guidance for animal control (NRCS/USDA — Fence Conservation Practice Standard; https://www.nrcs.usda.gov/resources/guides-and-instructions/fence-ft-382-conservation-practice-standard — consulté le 04/09/2026).
On uneven terrain, cut rails to match step or rack patterns and pre-fit sections on the ground before final fastening. Check alignment frequently with a string line to keep a consistent visual and structural line along the fence.
Fittings, finishes, and gates
Add post caps to shed water from the top of wood posts, and apply sealant or preservative to wood components according to product instructions. For metal or vinyl components, follow manufacturer guidance for fastener type and corrosion protection.
Gate posts require reinforcement: set them in concrete or use larger-diameter posts and anchor hardware rated for gate loads. Install heavy-duty hinges and use a plumbed template to ensure smooth swinging. Reinforce latching points so gates stay aligned under repeated use.
Case-specific adaptations
Rocky soil often prevents digging standard holes. In those cases, consider helical anchors or driven posts designed for hard substrate, or consult a professional—do not force a standard post hole where the ground resists excavation. For soils that are very sandy or very clayey, increase depth or use concrete as needed and add extra gravel for drainage when possible (This Old House; https://www.thisoldhouse.com/fences/post-installation — consulté le 04/09/2026).
In cold climates, use the local frost line to determine minimum embedment; consult local building authorities if uncertain. For windy locations, reduce spacing or increase post diameter and embedment to resist uplift and racking. For animal fencing, follow NRCS recommendations for height and strength appropriate to the species and stock density (NRCS/USDA — Fence Conservation Practice Standard; https://www.nrcs.usda.gov/resources/guides-and-instructions/fence-ft-382-conservation-practice-standard — consulté le 04/09/2026).
Maintenance and expected longevity considerations
Maintenance varies by material. Wood requires periodic inspection for rot, resealing, and tightening hardware. Metal components should be checked for corrosion and repainted or protected as needed. Vinyl fences benefit from periodic cleaning and hardware checks. Regularly inspect that posts remain plumb and that rails are secure.
Document repairs and inspect after storms or heavy use. Replace any rotten post rather than relying on local patch fixes that may fail under load.
Final checklist before you finish
- Post alignment and plumb checked along the entire run.
- Spacing between posts matches planned spacing, with reduced spacing at corners and gates (typical 6–8 ft spacing; 4–6 ft for high-stress spots) (This Old House;consulté le 04/09/2026
- Gravel base installed beneath posts for drainage where applicable (6 in 3/4 in gravel recommended) (This Old House;consulté le 04/09/2026
- Concrete used for end and gate posts or problem soils; allowed to set approximately 24 hours before adding load (This Old House;consulté le 04/09/2026
- Gates square and hardware rated for intended use.
- Utility locations verified with 811 and permits checked.
Resources and further reading
Detailed project steps, product recommendations, and diagrams are available from Home Depot and Lowe’s project guides, and This Old House provides specific installation recommendations for posts and drainage (This Old House; https://www.thisoldhouse.com/fences/post-installation — consulté le 04/09/2026; Lowe’s — How to Install a Split-Rail Fence; https://www.lowes.com/n/how-to/install-a-split-rail-fence — consulté le 04/09/2026; The Home Depot — How to Build a Fence; https://www.homedepot.com/c/ah/how-to-build-a-fence/9ba683603be9fa5395fab90a485b4ce — consulté le 04/09/2026). For rural and livestock-specific standards, consult NRCS/USDA guidance (https://www.nrcs.usda.gov/resources/guides-and-instructions/fence-ft-382-conservation-practice-standard — consulté le 04/09/2026).
What we do not know
This guide does not provide project cost estimates, total project time, or the exact number of posts required for a specific parcel—those depend on site dimensions and local conditions. The local frost line depth is not given here; consult local building authorities. The site’s DATA-BANK was not available for this brief, so no proprietary statistics or internal measurements are included. This article does not replace a professional site assessment when bedrock, utility conflicts, or permit complexity is likely.
When to call a professional
If you encounter bedrock, large boulders, suspected high-voltage lines, drainage that undermines post bases, or complex easement and permitting questions, hire a licensed contractor or engineer. For livestock control design beyond basic post-and-rail configurations, consult NRCS guidance or an agricultural fencing specialist.


Rédactrice · clôtures, portails, aménagements extérieurs
Laura couvre les tendances et innovations en matière de clôtures et portails de jardin. Elle prend soin de vérifier les informations en consultant des sources fiables et en croisant plusieurs avis avant de publier.
Les questions traitées dans cette fiche
Dans la même zone : Techniques d'Installation
9 étapes7 min de lecture
Techniques d'Installation
10 étapes6 min de lecture
Techniques d'Installation

12 étapes8 min de lecture
Techniques d'Installation
10 étapes8 min de lecture
Techniques d'Installation